Week 5
On Saturday, March 18th, 2006, we removed the cups and wiped the chips.
Each day, since starting the test, the water condensation from the previous day was ALWAYS on the chip. As we stated, we never wiped the water from the chip. Therefore, the chip was basically covered in water from Monday-Saturday. The water ran around the cup edge and typically down toward the bottom of the picture...although never falling off the chip.
Sample 1 completely unfinished
Sample 2 (1) coat of PU finish + (2)
undercoat PU sealers
Sample 3 (2) coats of PU finish + (2)
undercoat PU sealers
Sample 4 (5) coats of PU finish + (2)
undercoat PU sealers
Sample 5 (2) coats of PU finish + (4)
undercoat PU sealers
Sample 6 (2) coats of PU finish + (6)
undercoat PU sealers
Sample 7 (1) coat of Melamine finish +
(2) undercoat Melamine sealers
Sample 8 American cabinet company
drawer front (head).
Not much again this week, but there are a few things to note.
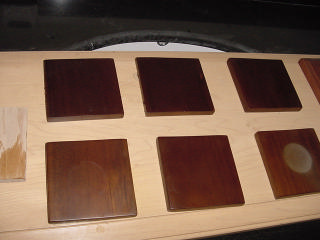
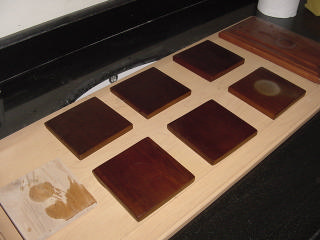
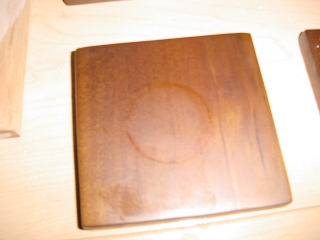
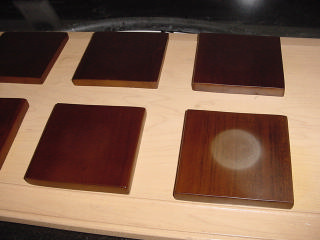
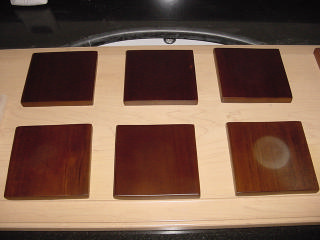
Below are two pictures of the chips immediately wiped clean with a paper towel. Notice the slight ring on SAMPLE 5 (this is bottom LEFT). Yes, SAMPLE 7 looks bad again...but we guess might return again to its color within a few hours. Anyway, a lot of the samples have a water-mark ring before cleaning. Sometimes, it is lighter and sometimes more noticeable.
What we want to discuss this week was the increased rubbing or cleaning of the chips. The water-mark was more trouble this week on SAMPLE 2, 3, and 5. It took a few minutes each sample to clear the chip of any telltale signs. Even after completely cleaned, we tested several other ways to look for ring damage.
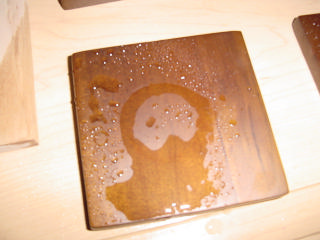
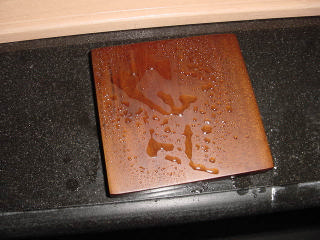
What we want to show you here is the Simple Green solution sprayed onto the chip BEFORE it was rubbed clean or any attempt to really clean the sample. The pic to the left is SAMPLE 5. This chip was cleaned off before we sprayed the solution. When we sprayed the cleaner, the solution took the form of the old ring. We did the same thing to SAMPLE 6 (right pic) and it did not form any pattern. Therefore, the water-mark on SAMPLE 5 seemed to indicate some sort of internal ring.
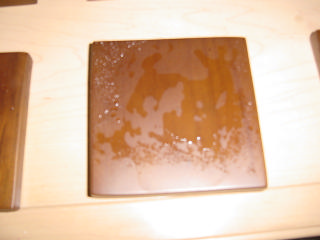
Below are both SAMPLE 5. The left pic is the SAMPLE before cleaning. Remember, the pic above is what happens when you spray Simple Green. After cleaning and rubbing with our thumb at the water-mark spot, the ring is removed. Why is this significant? Because we really haven't had this trouble in the past. We're not sure this is a future indicator, but we believe so. The pic below, to the right, is AFTER cleaning. The Simple Green beads in a non-consistent pattern with no sign of a mark.
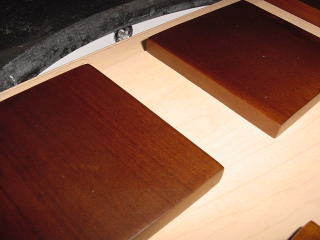
Below is SAMPLE 2 and 3....both pictures. These samples had water-rings, but also rubbed out with our thumb.
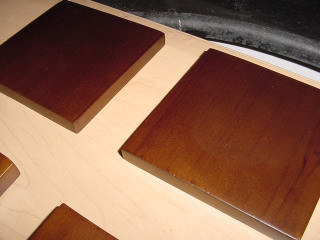
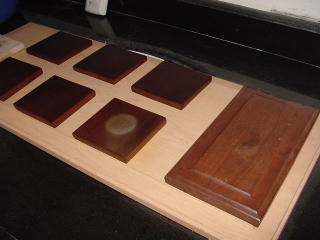
This is just a general shot after cleaning.
Really, we feel there was some indication from SAMPLE 2, 3, and 5 that something is happening. There is no physical evidence other than it takes longer to clean the chip of the water-marks. Yet, it seems odd that SAMPLE 4 and SAMPLE 6 really didn't produce any water-marks. These are the two strongest finishes.
We reached 600+/- hours of constant water on the chips this week. We might have discounted the extra cleaning, but SAMPLE 5 was the most curious. It just took a good thumb-rub to remove the water-mark....more than previous weeks.
Let me be clear, SAMPLES 2-6 cleaned up well and showed no indication of tabletop damage. We will now monitor the cleaning situation in more detail. We're not seeing damage, but this week was just a bit harder to clean. Let's see if this happens again next week.
Next week, we will provide more detailed close-ups of each sample.